Establishing account alerts
Through Bryant Bank Digital Banking, you can create and manage alerts about the status of your accounts and when certain transactions occur. When you create an alert, you specify the conditions that trigger the alert and the delivery options to receive that alert.
Once alerts have been established, you will be able to make edits at any time.
Mobile app
Step 1: Select an Account
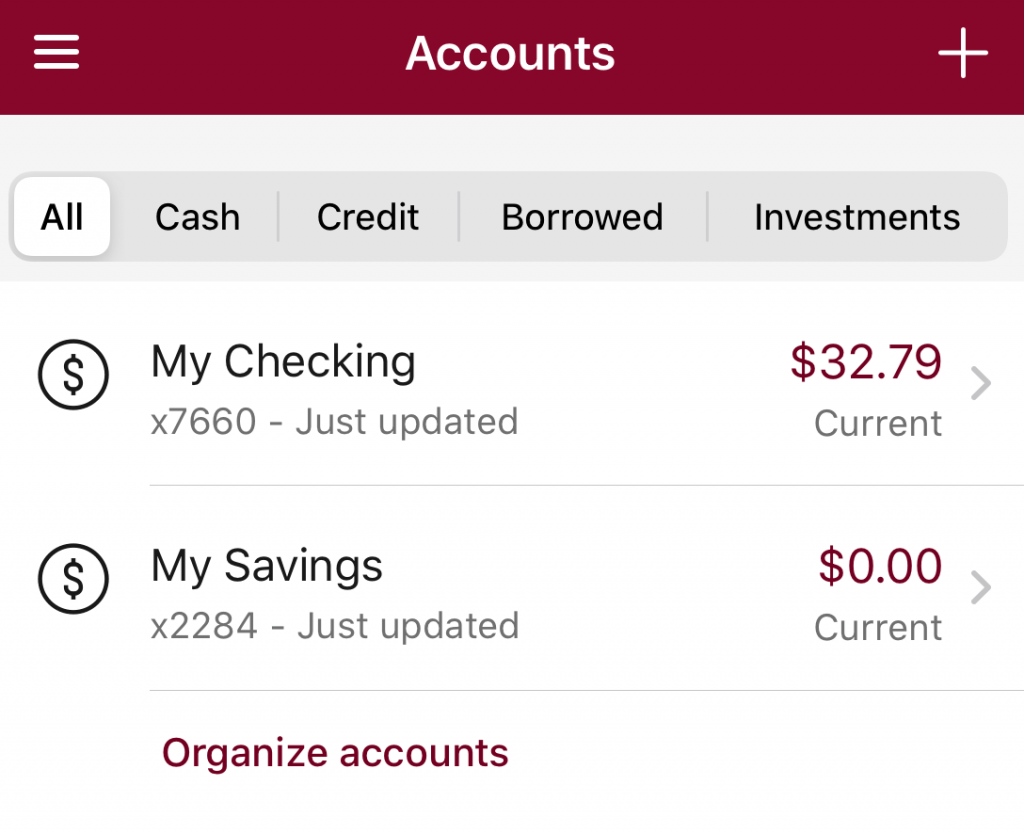
Accessing the settings of your specific accounts can be done in a few ways. One option is to select Accounts from the main menu. At this point, all of your accounts will be listed. Select the account you wish to establish alerts for. If you have multiple accounts that you would like to do this with, the process will have to be repeated.
Accessing the settings of your specific accounts can be done in a few ways. One option is to select Accounts from the main menu. At this point, all of your accounts will be listed. Select the account you wish to establish alerts for. If you have multiple accounts that you would like to do this with, the process will have to be repeated.
Step 2: Establish Alert Settings
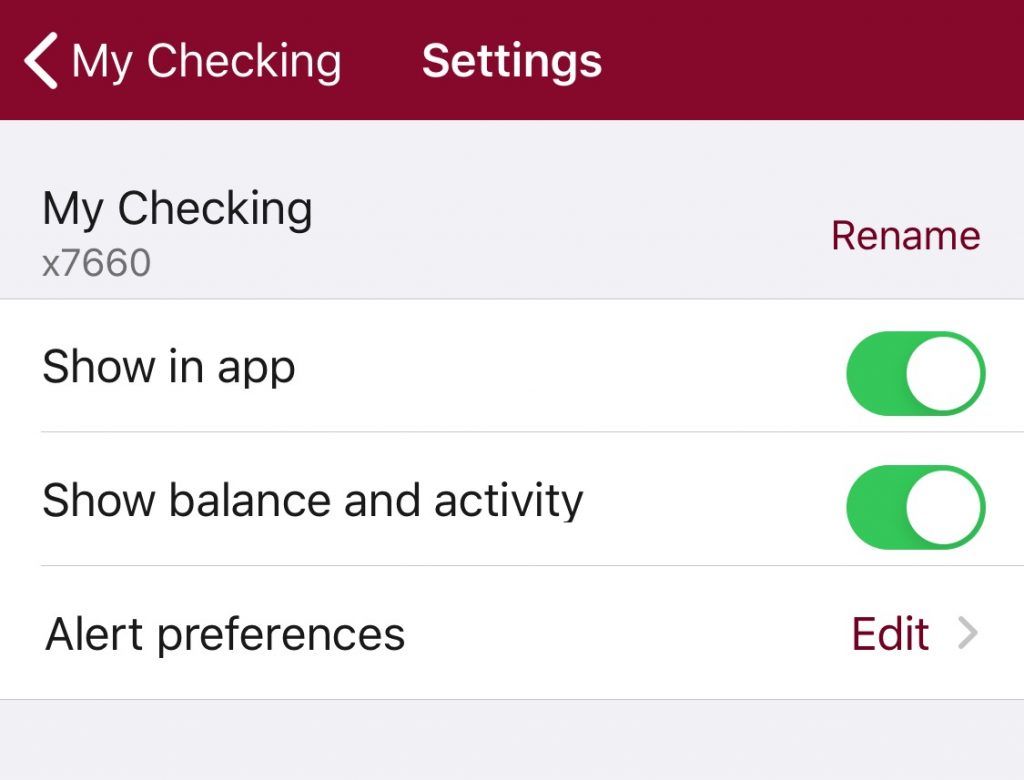
Once you have selected the account that you wish to establish alerts for, select Settings and then select Edit, which is located to the right of Alert preferences.
Once you have selected the account that you wish to establish alerts for, select Settings and then select Edit, which is located to the right of Alert preferences.
Step 3: Creating Balance and Transaction Alerts
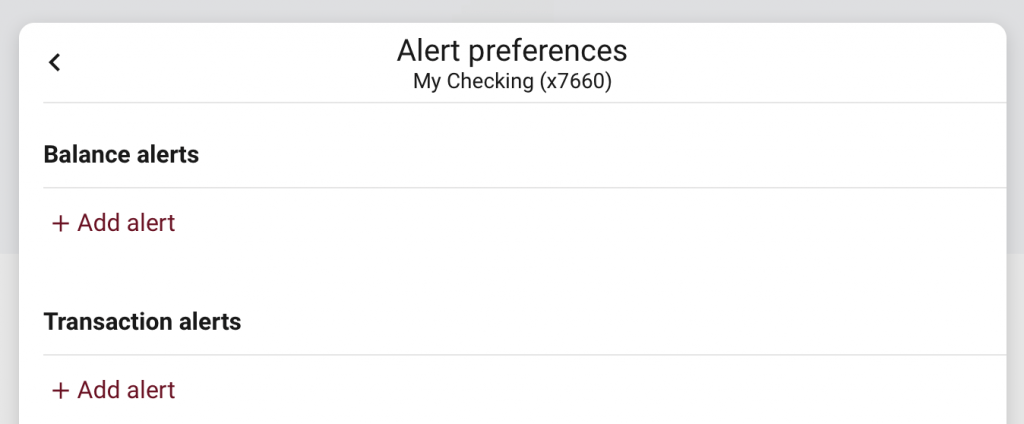
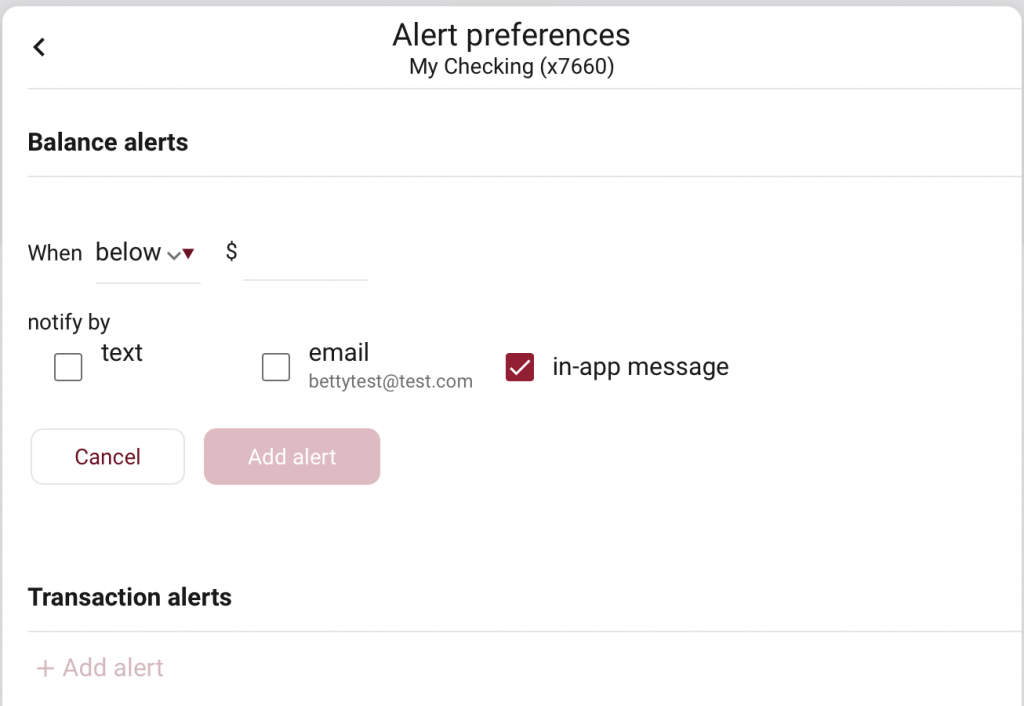
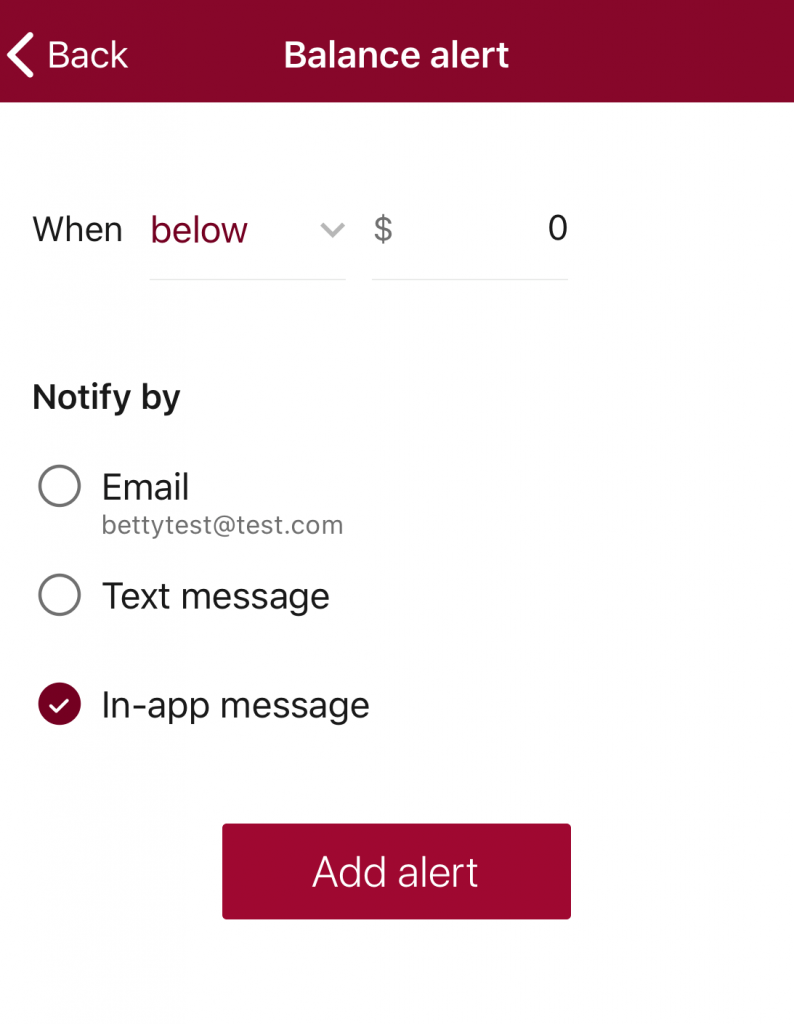
The system will allow you to establish Balance and Transaction alerts. Select Add alert to begin the process. For the delivery method, you will have the choice to receive alerts by email, Text message, and In-app message. Create the parameters for the alert, select the Notify by option(s), and then select Add alert.
The system will allow you to establish Balance and Transaction alerts. Select Add alert to begin the process. For the delivery method, you will have the choice to receive alerts by email, Text message, and In-app message. Create the parameters for the alert, select the Notify by option(s), and then select Add alert.
Desktop
Step 1: Select an Account
Accessing the settings of your specific accounts can be done in a few ways. One option is to select Accounts from the main menu. At this point, all of your accounts will be listed. Select the account you wish to establish alerts for. If you have multiple accounts that you would like to do this with, the process will have to be repeated.
Accessing the settings of your specific accounts can be done in a few ways. One option is to select Accounts from the main menu. At this point, all of your accounts will be listed. Select the account you wish to establish alerts for. If you have multiple accounts that you would like to do this with, the process will have to be repeated.

Step 2: Establish Alert Settings
Once you have selected the account that you wish to establish alerts for, select the Alerts preferences tile.
Once you have selected the account that you wish to establish alerts for, select the Alerts preferences tile.

Step 3: Creating Balance and Transaction Alerts
The system will allow you to establish Balance and Transaction alerts. Select Add alert to begin the process. For the delivery method, you will have the choice to receive alerts by email, Text message, and In-app message. Create the parameters for the alert, select the notify by option(s), and then select Add alert.
The system will allow you to establish Balance and Transaction alerts. Select Add alert to begin the process. For the delivery method, you will have the choice to receive alerts by email, Text message, and In-app message. Create the parameters for the alert, select the notify by option(s), and then select Add alert.
